

Introduction
The purpose of this sequence is to measure single frequency interference (tonal noise) in the send path of a
communication device such as a headset or speakerphone. It is based on the Microsoft Teams Audio Test
Specification, Section 6.6.
Narrow-band noise, including single frequency interference, is an impairment that can be perceived as a tone
depending on its level relative to the overall noise level. This can be caused by electrical noise in soundcards, fan
or hard disk drive noise on laptops or other sources. This test sequence makes sure that no tonal noise is present
in the send signal.
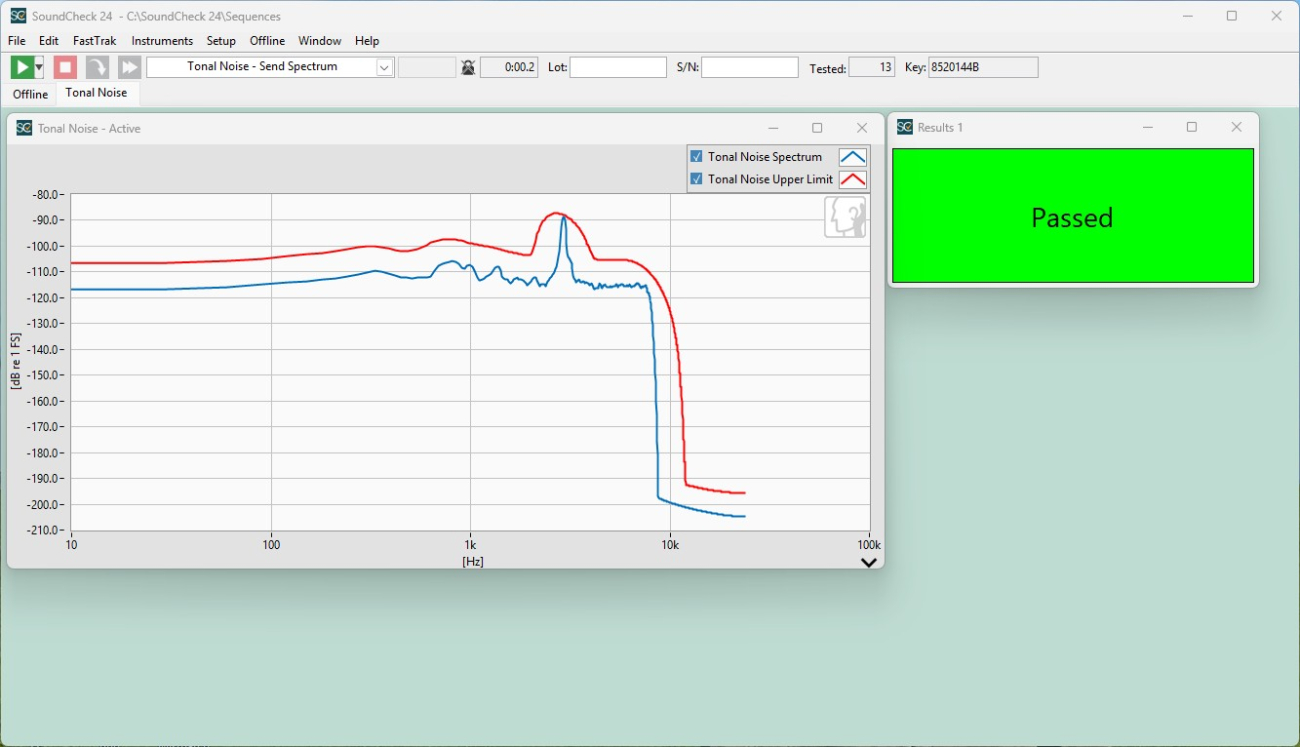
The sequence plays the IEEE Male speech file from a calibrated mouth simulator at a level of 94 dBSPL followed
by a brief period of silence. A constant 30 Hz, Flat Top FFT with 4096 sample size is used to analyze the silence
and calculate the tonal noise spectrum. A tolerance mask is then created by 1/1 octave smoothing the noise
curve and applying +10 dB to the curve throughout its entire frequency range. If the unsmoothed tonal noise
spectrum peak remains below the tolerance mask, the test is passed.
Software Requirements
SoundCheck 24 Plus or newer
Hardware Requirements
Audio Interface – Listen AudioConnect 2 (p/n 4047) or similar
Audio Power Amplifier – Listen SCAmp (p/n 4060) or similar (needed for passive mouth simulators. Not needed
for powered mouths.)
Mouth simulator – HATS mouth (for headset or speakerphone) or stand-alone (for speakerphone)
Hardware Setup & Calibration
Note: Reference Section 5 of the MS Teams Audio Test Specification, for detailed hardware set-up
recommendations. A copy of the spec is available for download here.
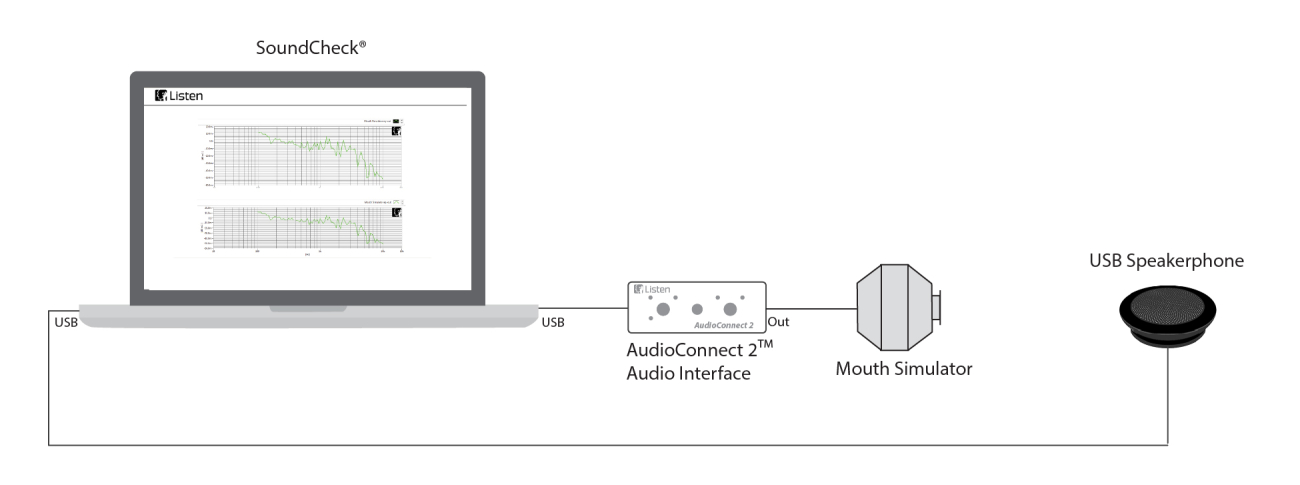
1. Connect your hardware as shown in the following diagram.
2. Calibrate the mouth simulator per instructions in the SoundCheck user manual
You are ready to start the sequence.
SoundCheck Setup (USB DUT)
● If your DUT uses a USB connection, you will need to create a new Input channel in the Hardware editor.
● Connect your USB DUT to the SoundCheck host computer
● Go to Setup > Hardware > Hardware Table
● Right click on the Input Channel table and select Add Channel. Name the channel when prompted.
● Select WDM/MME from the Driver dropdown list (Windows) or Core Audio (macOS)
● Select the USB DUT friendly name from the Device dropdown list
● Select Digital from the Type dropdown list
● Select the desired sample rate from the Default Sampling Rate dropdown list. The selected sample rate
should reflect the sample rate shown in your operating system’s audio hardware configuration settings.
Typically, the highest available sample rate should be selected.
● Click the Save button to close the Hardware Table and go to Setup > Calibration > Calibration Table
● On the Signal Path named Send (DUT to SC) select the Unity Digital Out (AES 17) file from the
Calibrated Device dropdown list and select the Input Hardware Channel you just created from the HW
Channel dropdown list.
● Click the Save button to close the Calibration Table.
SoundCheck Setup (Analog DUT)
If your DUT uses an analog connection, connect it directly to one of your hardware input channels and assign that
channel to the Send (DUT to SC) Signal Path in the Calibration Table.
Further sequence development
This sequence has been designed for simplicity and has been written for a stereo channel system, to be
accessible to 100% of SoundCheck customers. Ways in which you could modify or further develop the sequence
include:
● If your DUT has multiple send paths, you can add them to Hardware, Calibration and the Acquisition
step’s input table. You can then group the recorded time waveforms and batch analyze them.
● Modify the input signal path to test a Bluetooth communication device.


